How to integrate Umami Analytics into your Ghost website


what is umami analytics?
Umami Analytics is an open-source, privacy-focused alternative to Google Analytics that lets you gather important usage data while respecting the privacy of your users.
The analytics system is easy to use, integrate, and understand without needing to run complicated reports, and collects only the metrics you care about. You can create custom events for any additional actions you'd like to track.
Umami is also dedicated to open-source development and is fully transparent, battle-tested, and community supported. You can self-host your own copy, or you can use Umami Cloud if you just want to get started right away. The free tier is more than enough for beginners, and the paid tiers are pretty reasonable.
why umami over google analytics?
Some readers may ask "Why don't you just use Google Analytics?" and to that, I would say: Great question!
Google Analytics is definitely a more developed product, however, it does have some major drawbacks, such as a sketchy past with handling user data and not fully complying with privacy laws such as GDPR.
Google Analytics is also having some push-back with the migration from Univeral Analytics (UA) to the new Google Analytics 4 (GA4) system. Having used GA4 in my day job, I didn't want to have to deal with it for my hobby website!
As mentioned previously, Umami is also free for most users, self-hostable, and fully open-source!
guide
prerequisites
(1) Ghost blog
- Can be self-hosted or through GhostPro (the basic Ghost Pro plan is enough for what we need)
(2) Umami Cloud Account
- You can also self-host Umami but that is out-of-scope for this guide
step 1 - create your website in Umami Cloud
Once you’re logged in you should see your dashboard, if you don’t, go to https://cloud.umami.is/settings/websites
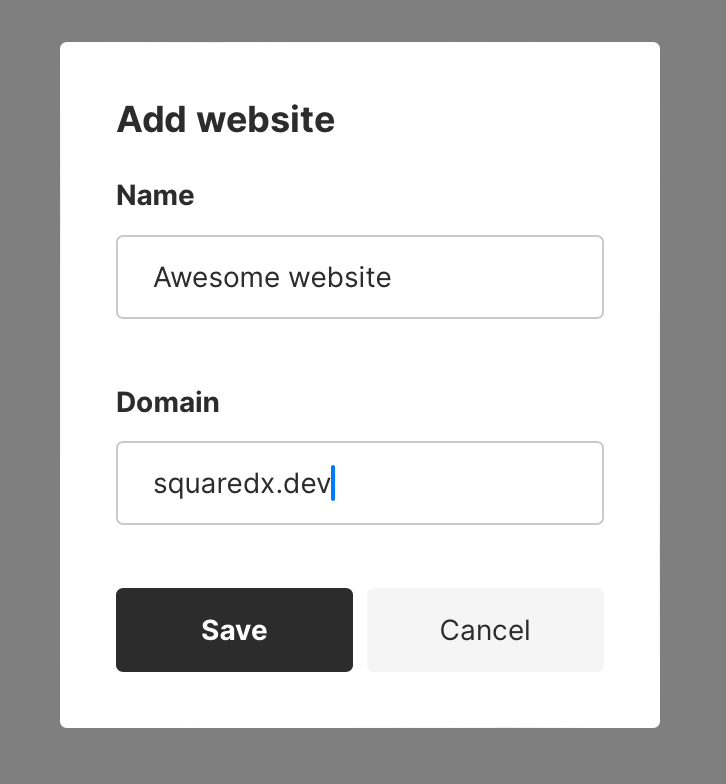
On this page, click the Add website button and fill out the information. Note! When entering the URL, you don’t need to add the http/https in the text field.
step 2 - injecting the umami script in Ghost
Click the Edit button on the website record in the Umami Dashboard, and navigate to the Tracking Code tab.
Next, copy the <script ...> snippet of HTML code.
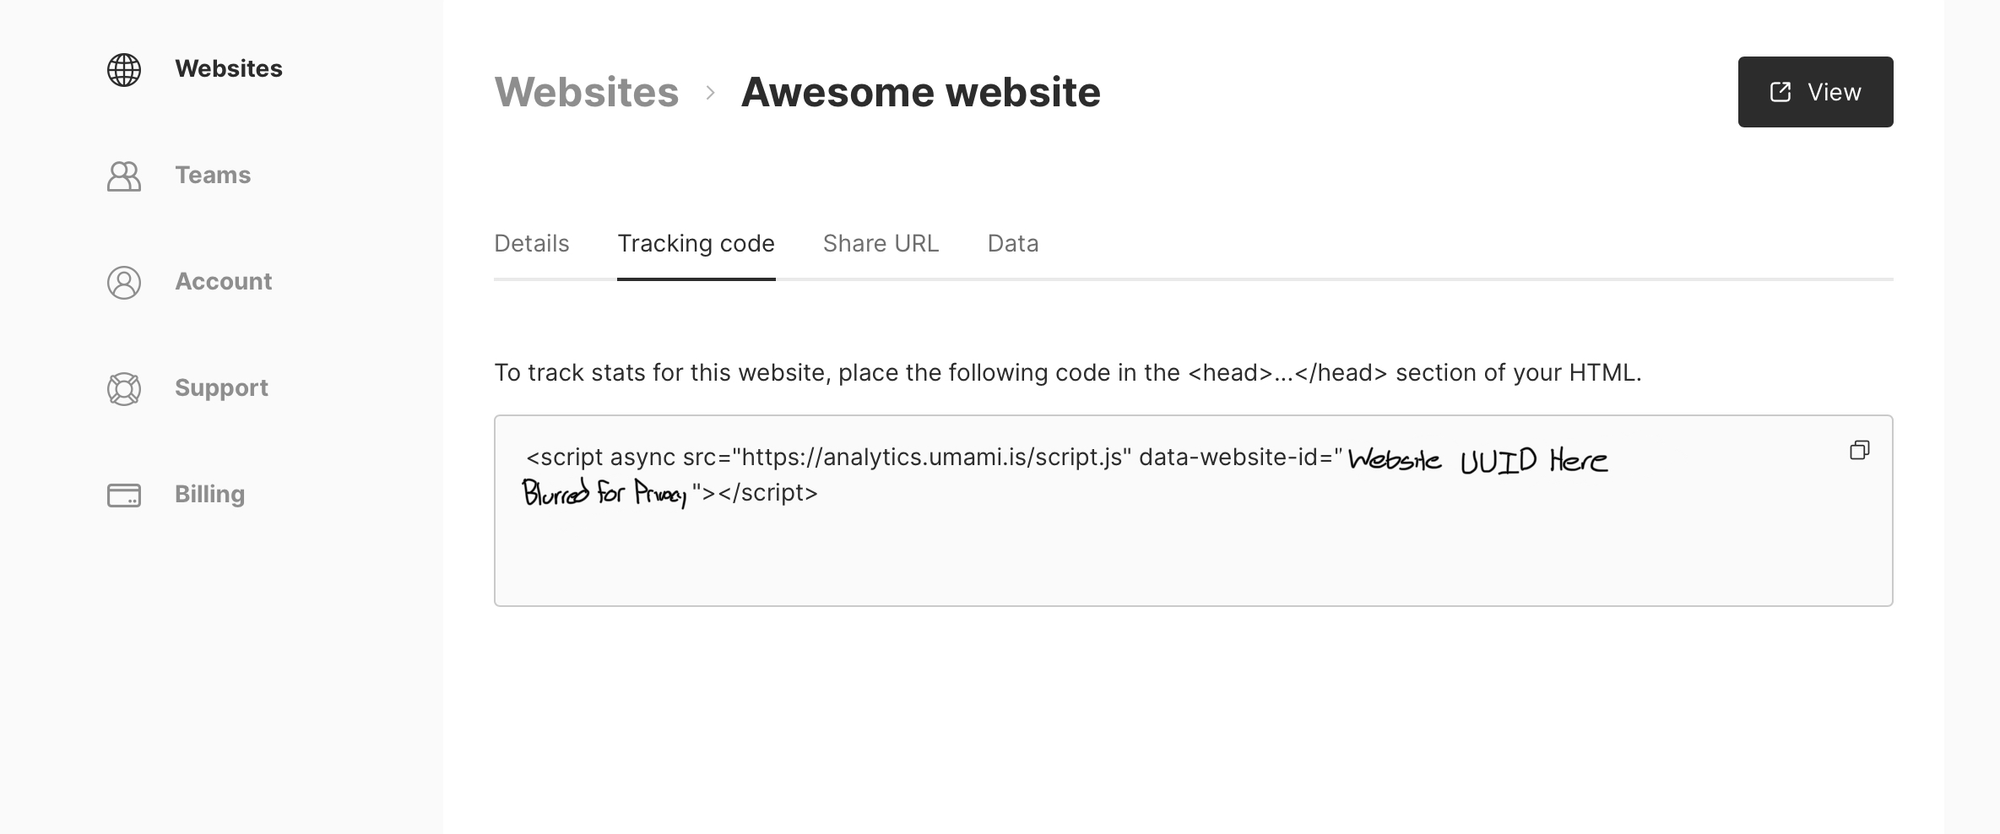
Navigate to Settings > Code Injection in the Ghost Admin panel
Paste the snippet of code you got from Umami into the “header” section of the code injection page and press the save button at the top of the page
What this does is it will inject this little piece of code on all user-facing pages on your Ghost blog

step 3 - check to make sure everything is connected!
Once the tracking script is saved to the code injection screen of your Ghost blog you should be all set! Open a new tab and navigate to the homepage of your blog.
Now let's double check to make sure Umami is receiving events from your website. In the Umami Dashboard, select the View button and navigate to the Realtime tab.
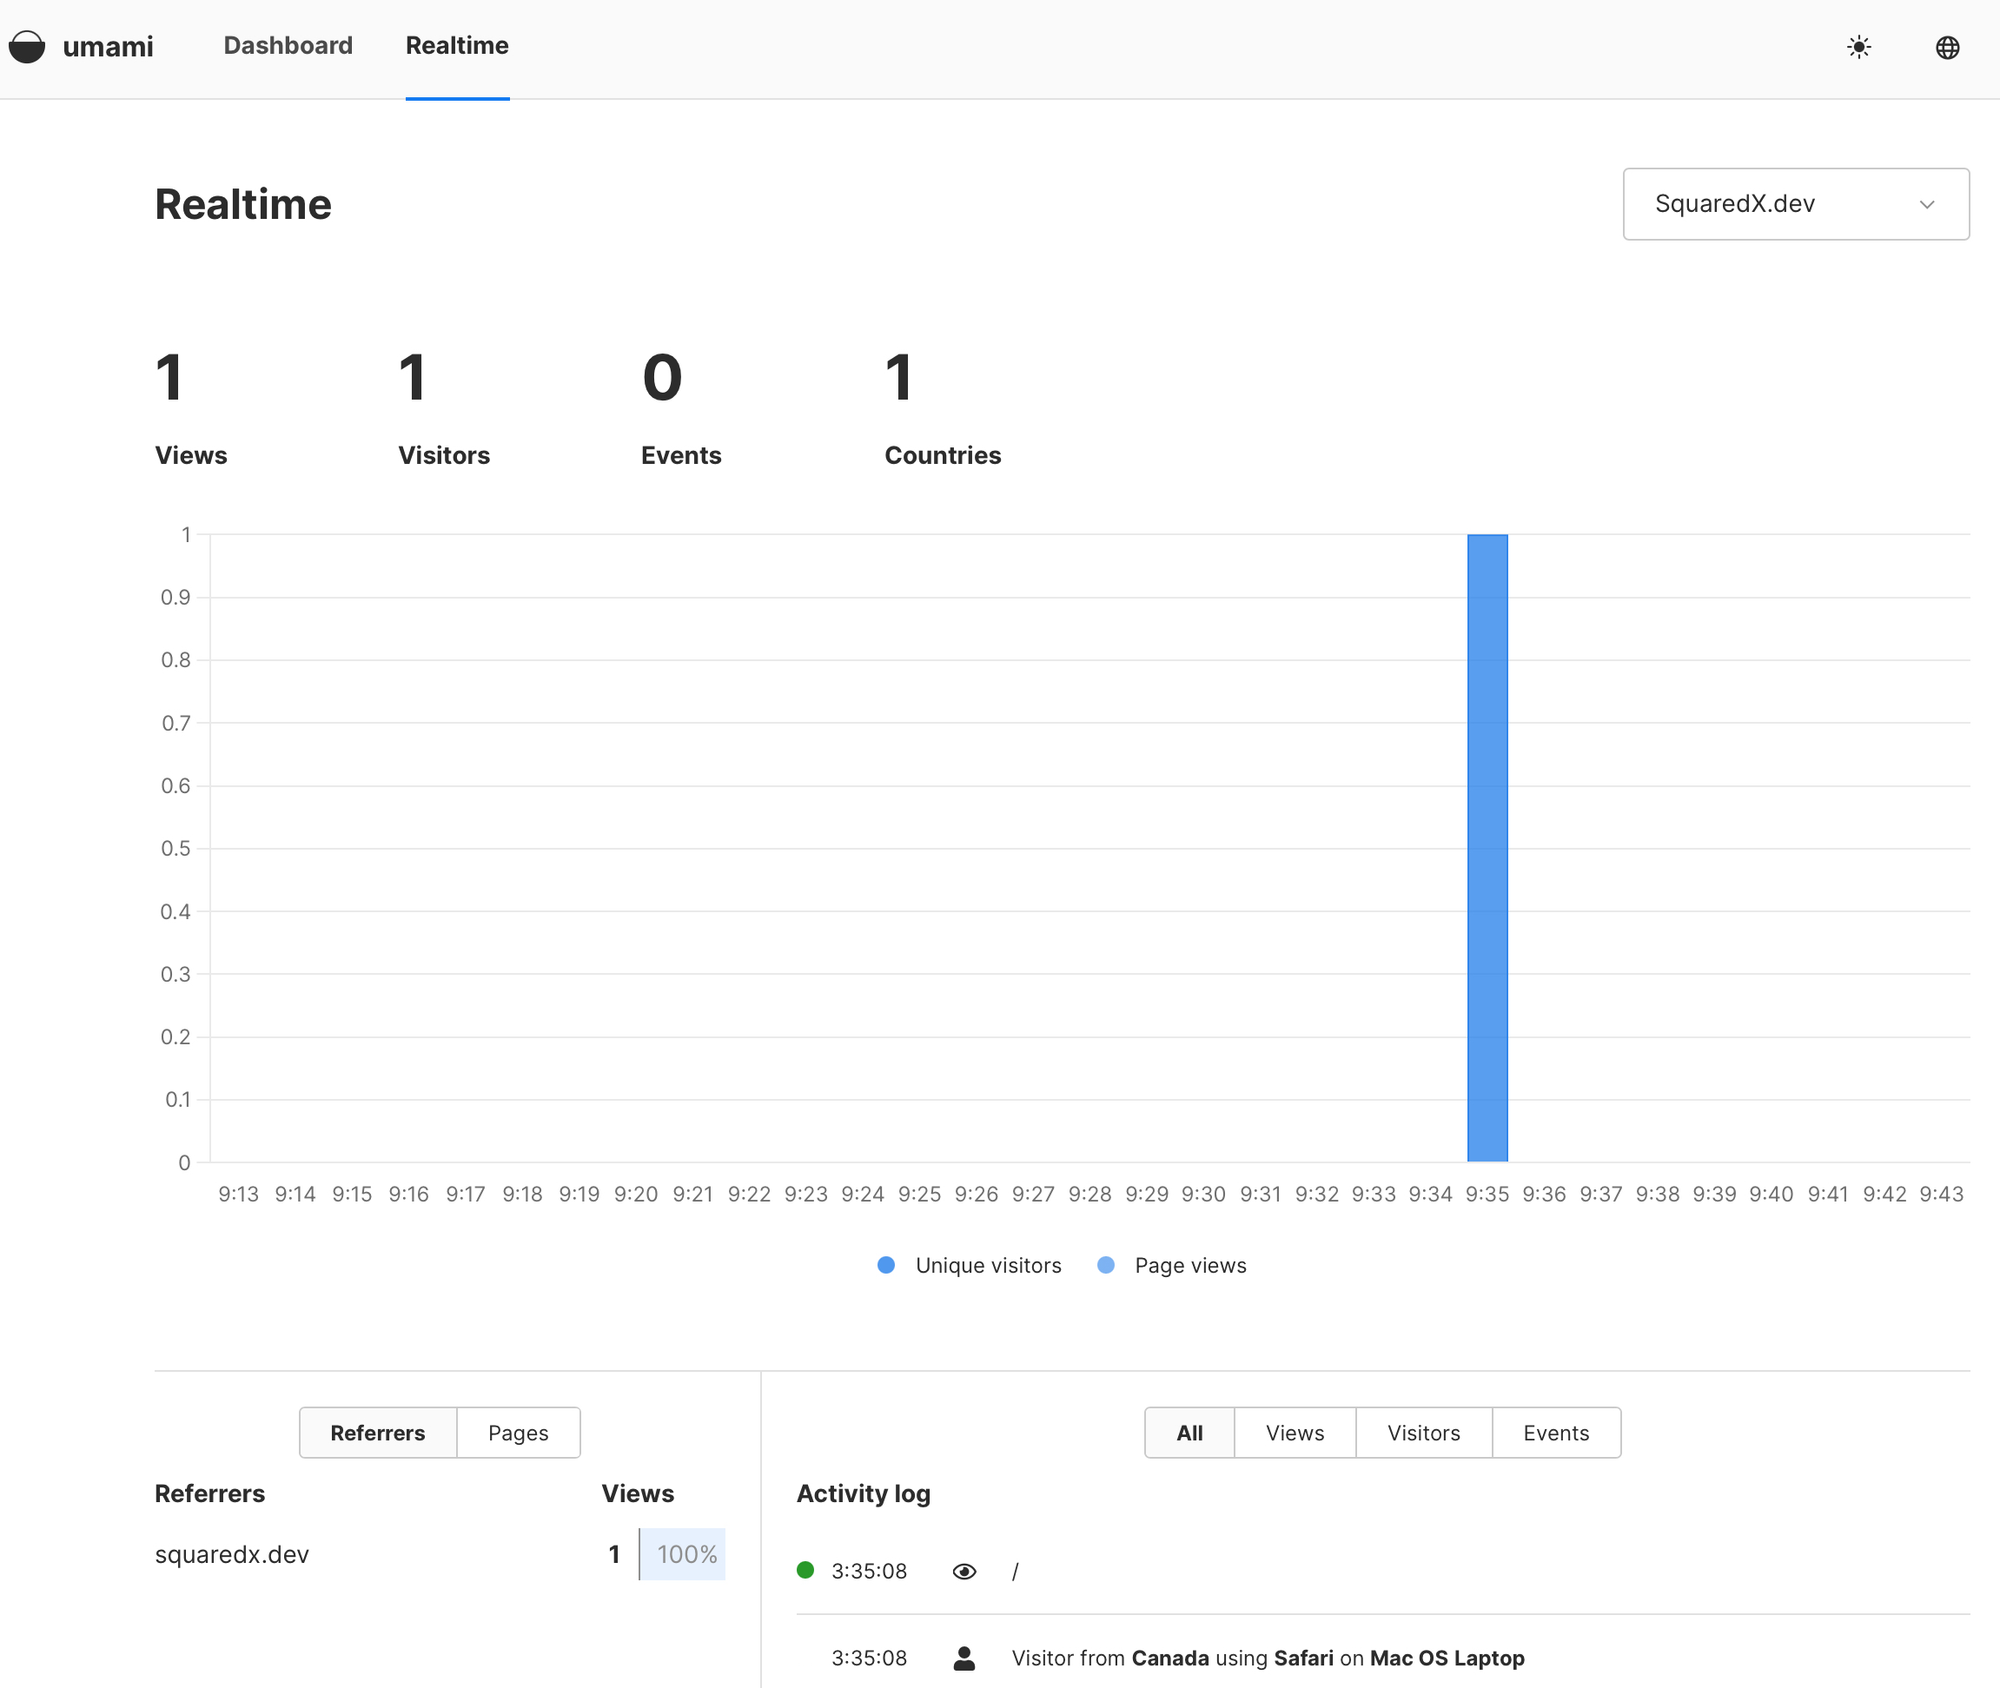
If everything is set up correctly you should see something similar to the image above! 🎉
optional step 4 - create a custom event for outbound link clicks
I was curious to see if any external links in my posts were being clicked, and after some googling, I found it was actually really easy to set up!
To set this up, go back to the Code Injection page in your Ghost Admin and insert the following snippet of code BELOW the code you inserted above.
<script>
  document.addEventListener('click', function (event) {
    var link = event.target;
    while(link && (typeof link.tagName == 'undefined' || link.tagName.toLowerCase() != 'a' || !link.href)) {
      link = link.parentNode
    }

    if (link && link.href && link.host && link.host !== location.host) {
      umami.track('Outbound Link', { link: link.href });

      // Allow event to be sent before the page is unloaded
      if(!link.target || link.target.match(/^_(self|parent|top)$/i)) {
        setTimeout(function() { location.href = link.href; }, 150);
        event.preventDefault();
      }
    }
  })
</script>
Code Explanation: This snippet of code adds an event listener on each page of your Ghost site that is triggered whenever a “click” event is fired from your browser. A click event occurs whenever a user presses the click button or taps their screen on the website.
The first while loop is used to find if the click even occurred on a link tag, a tags are used for links in HTML.
Next, the if statement is used to check if the link destination is an internal or external link. If it’s internal we can do nothing, but if it’s external we want to track it!
The umami object is provided by the code snippet we added to our website in step 3, and we use the .track method to send the analytic event.
We use the setTimeout bit of code to give us a little delay when we click a link so we have enough time to send a tracking link
that’s it!
Thanks for reading, if this helped or if you would like to be notified about future posts, please consider subscribing to my newsletter!